
 By Admin
Last updated: November 03, 2026
Key Takeaways
- Safe digging distance depends on wall type, height, footing depth, and soil; the base zone is the riskiest area.
- Drainage problems are the biggest warning sign because water pressure is a leading cause of wall failure.
- Settlement, loose fill, oversteepened cuts, and soil movement are the main red flags to look for.
- Wall type determines which hidden supports matter most and what digging can disrupt.
Before any shovel goes in, inspect the wall, the soil beside it, and everything buried or built around it. This guide to What to Inspect Around a Retaining Wall Site Before Digging helps homeowners, landscapers, and contractors decide whether a trench or post hole is safe to open. A retaining wall can fail fast if you cut into its support zone, hit a drain line, or start digging where runoff already weakens the base. For wall-height and permit context, many places treat 4 feet as an engineering threshold, and local rules vary.12
I write on site prep, drainage, and excavation risk because the hidden failure points are usually not the wall itself; they are the ground, water, and utilities around it.
What should be checked first around a retaining wall?
Check the wall’s condition, the ground slope, surface drainage, and utility locations before you touch the soil. Those four checks tell you whether digging is routine or dangerous.
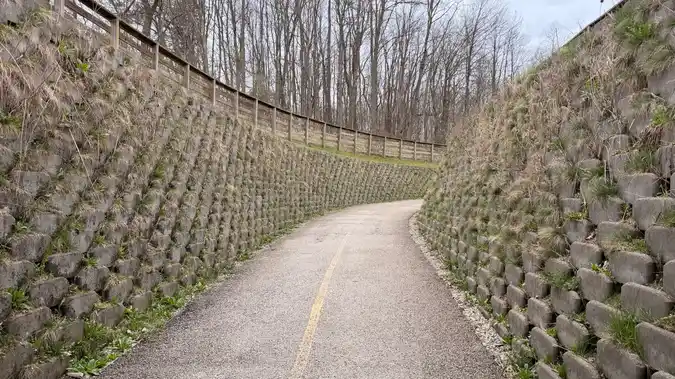
Start at the wall face and work outward. Look for horizontal cracks, leaning, bulging, rotated blocks, separated joints, soil spilling through gaps, and white mineral staining. Those are not cosmetic details. They are clues that the wall is already loading unevenly or that water is building pressure behind it. A wall that is leaning even a little should be treated cautiously; if it is taller than 4 feet or visibly out of plumb, consult a qualified engineer or contractor before digging nearby.13
Next, inspect the drainage path. Water should move away from the wall, not toward it. Downspouts, patio drains, splash blocks, low spots, and compacted backfill all matter here. If stormwater already pools near the wall after rain, digging nearby can make the problem worse by opening a path for water to collect behind the structure.
Then check for buried utilities. Call your local utility-locate service before digging, even for a narrow trench. In the U.S., 811 is the standard call before excavation.4 A shallow hole can still hit electric, gas, water, irrigation, fiber, or sewer lines. For trench safety, OSHA also warns that excavation hazards can develop quickly once soil is disturbed.5
Finally, look at what the wall is holding back. If it supports a driveway, pool deck, fence, staircase, or structure, the risk rises fast. Digging near a loaded wall can undermine the base or change the soil pressure it was designed to resist.
How far from the wall is it safe to dig?
The safe distance depends on the wall type, height, footing depth, and soil, but digging directly beside the base is the highest-risk move. The closer the excavation is to the wall, the more likely you are to remove support or disturb drainage.
A useful field rule is to treat the area directly behind or beside the wall as a no-dig zone until you know the wall’s construction, but consult a qualified professional when the wall is tall, stressed, or supports a load.13 Segmental block walls, poured concrete walls, timber walls, and stone gravity walls fail in different ways. A short decorative wall may tolerate nearby planting holes. A taller engineered wall with geogrid reinforcement may not tolerate even a shallow cut in the reinforced soil zone.
The key issue is not just distance in feet; it is depth relative to the wall height. The deeper the dig, the more likely it is to intersect the wall’s footing, drainage gravel, filter fabric, or reinforcement zone. A small hole 12 inches deep beside a 3-foot wall is a different problem from a 24-inch trench beside a 6-foot wall.
Also check for signs that the wall has already been backfilled and compacted in layers. If the soil beside it is firm and uniform, the wall may be relying on that compacted mass. If you remove it and replace it loosely, you can create voids and settlement that show up months later.
If the wall is high, cracked, leaning, or supporting a driveway or structure, this is the point to stop and get an engineer or qualified contractor involved.
What drainage clues tell you the wall is risky to dig near?
Poor drainage is the clearest warning sign because water pressure is one of the main reasons retaining walls fail. If you see water problems now, excavation can turn them into movement or collapse.
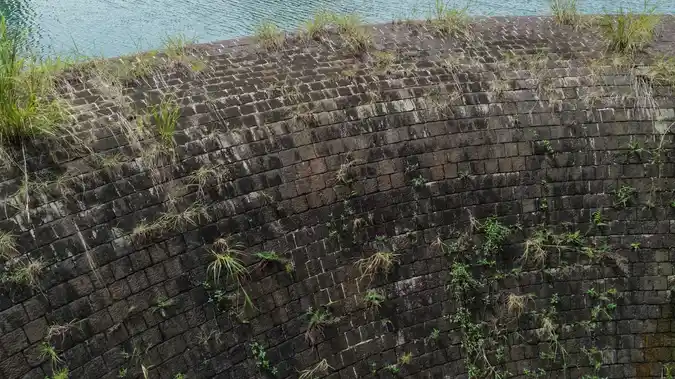
Look for wet soil that stays dark long after rain, algae growth on the wall, rust-colored streaks, mineral deposits, and sinkholes or soft spots behind the wall. Those clues can indicate trapped water, blocked drain tile, or backfill that no longer drains the way it should. If there is a perforated pipe behind the wall, check whether the outlet is visible and clear. A plugged outlet can leave the wall carrying more hydrostatic pressure than it should.
The surface above the wall matters too. If the yard slopes toward the wall, or if a downspout empties near it, every storm sends more water into the system. Digging into saturated soil is worse than digging into dry soil because wet fill slumps more easily and sheds support faster.
A lot of generic advice stops at “look for drainage.” That is too vague. The real question is whether the wall has a path for water to escape. If you cannot identify a drain outlet, gravel backfill, or positive surface grading away from the wall, assume drainage is not behaving ideally until proven otherwise.
This is one of the few situations where waiting a day after heavy rain can help. Dry soil exposes shape and settlement better than soaked soil, and you can see whether water is moving where it should.
What should you look for in the soil and slope before digging?
Look for settlement, loose fill, oversteepened cuts, and any sign the soil has already started to move. Those conditions matter as much as the wall itself.
Walk the line behind and beside the wall. If the ground has settled, you may see dips, cracks in nearby paving, open seams in paving stones, or a slight depression where the backfill has compacted unevenly. That can mean the support zone is already weakened. Digging there can enlarge the void and trigger more settlement.
Check the slope angle and the top edge of the wall. A wall sitting under a steep cut or near an abrupt grade change is more sensitive to disturbance than one on gentle terrain. If the soil above the wall looks freshly filled, fluffy, or different in color from the surrounding ground, it may be less stable than older compacted soil.
Also pay attention to roots. Large tree roots can either help stabilize soil or complicate the dig in a way that leads to voids later when they decay. If mature trees are near the wall, look for root heave, exposed roots, or signs the tree has been cut recently. Root systems and retaining walls often compete for the same space.
The practical rule is simple: if the ground already shows movement, do not assume a small excavation will stay small. Movement is a warning that the system is close to its limit.
Does the wall type change what needs to be inspected?
Yes. The wall type tells you which hidden parts matter most, and it changes what can go wrong when you dig.
A segmental concrete block wall often depends on compacted base material, drainage gravel, geogrid reinforcement, and proper setback. Before digging near one, inspect for cap movement, open joints, and signs the top course is shifting. A poorly built block wall can look fine until you disturb the area holding it in place.
A poured concrete wall can crack or tip if the footing is undermined. Inspect for vertical cracks, step cracks, or a lean at the top. If the wall is older, also check whether the footing is exposed anywhere. Digging near a footing is not the same as digging near a garden bed.
Timber walls need special attention because rot, fasteners, and hidden deterioration matter. Look for soft wood, rusting hardware, and bowed members. A timber wall can fail unexpectedly if one section has already weakened from moisture.
Stone or boulder walls can look stable while hiding voids between stones. Inspect for bulging, missing stones, and loose top pieces. These walls may rely heavily on gravity, so removing adjacent soil can change the balance quickly.
The type of wall also influences what you should not assume. A decorative wall and an engineered wall are not interchangeable. If you do not know which one you have, do not dig as if they are the same.
What utilities and structures must be cleared before excavation?
You need to clear utility lines, fence posts, stair footings, irrigation, and any structure attached to or bearing on the wall. A hidden line or footing can turn a simple dig into a repair project fast.
Start with the obvious systems: gas, electric, water, sewer, cable, and fiber. Then look for less obvious buried items such as sprinkler lines, low-voltage lighting cable, sump discharge pipes, and landscape drain piping. Retaining wall projects often run through yards that have been modified several times, so old lines may remain even if the original system no longer works.
Also inspect the structures attached to the wall. A fence mounted on top of a wall, a stair landing nearby, or a driveway edge can transfer load into the wall or require footing support you cannot see from above. Digging near one of these features may destabilize the whole assembly.
If the wall borders a pool, walkway, or building foundation, the margin for error is much smaller. A few inches of soil removal may be enough to expose a footing or undermine a slab edge. That is why the area around the wall should be treated as a system, not just a strip of dirt.
For reference and planning, the U.S. utility-locate standard starts with 811, and local rules may require more than one call before digging. Check your state 811 site and, where relevant, local excavation guidance before starting work.45
Which problems mean you should stop and get help?
Stop if the wall is leaning, the soil is wet and soft, the drainage path is unclear, or the dig would cut into the base zone of the wall. Those are the conditions that most often turn a normal job into a structural problem.
A wall that is already bowing, cracked, or bulging does not need more disturbance. If you can see daylight under the bottom course, missing blocks, or obvious movement after rain, the wall may be near failure. Digging beside it can remove the last bit of support.
Stop if you cannot identify where the wall drains. No visible outlet, no gravel indicators, and no clear grading plan is a bad combination. Water trapped behind a wall can build pressure quickly, and excavation often changes the way that water moves.
Stop if the wall is taller than about 4 feet and you are not sure how it was built. That height is a common threshold for engineered design and permits in many places, though local rules vary.12 If a permit, engineer, or contractor should have been involved originally, assume the risk is higher now.
This is not the place for optimism. If the wall shows movement or you do not know what holds it together, the smarter choice is to slow down before digging, not after the crack gets bigger.
| Criteria | DIY inspection before digging | Professional inspection before digging | Winner for this condition |
|---|---|---|---|
| Wall is under 3 feet and visibly stable | Usually enough for a basic check | May be unnecessary | DIY, if no other red flags |
| Wall is 4 feet or taller | Hard to assess hidden support correctly | Can evaluate footing, drainage, and reinforcement | Professional |
| Visible lean, bulge, or cracking | Can spot symptoms but not confirm cause | Can judge whether the wall is failing | Professional |
| Unknown buried utilities | Risks line strike without proper locate | Can coordinate locate and site planning | Professional |
| Drainage outlet is visible and clear | Good sign for a simple project | Still useful if wall is older or stressed | DIY, with caution |
| Soil is saturated or collapsing | Unsafe to continue digging | Can assess shoring, slope, and stability | Professional |
| Digging near a driveway, pool, or foundation | Easy to underestimate structural impact | Can assess load transfer and setback | Professional |
| Simple planting hole far from the wall face | Often manageable after a locate | May be overkill | DIY |
Should you dig at all, or change the plan?
Change the plan if the wall is stressed, the soil is wet, or the work would cut into the wall’s support zone. In those cases, the safer choice is to move the planting, reroute the trench, or bring in a pro.
This is the clearest recommendation: small surface work away from a healthy wall is usually manageable after a proper utility locate and a visual inspection. Deep digging near a tall, cracked, leaning, or poorly drained wall is not a casual landscaping task. It needs a more careful plan.
If the goal is planting, choose shallow-rooted plants and keep excavation shallow and wide rather than deep and narrow. If the goal is drainage repair, assume the wall may need partial dismantling or rebuilding, not just a hole dug beside it. If the goal is fence posts or hardscape, check whether the added load or footing will sit on soil the wall depends on.
When does the recommendation change?
The call flips in a few specific cases. First, a wall that is clearly decorative, low, and isolated from structures may tolerate simple digging after a locate. Second, if the wall has already been engineered with visible drainage, a firm base, and no distress, light excavation may be reasonable. Third, roots can make the plan more complicated, especially if a mature tree sits close enough that cutting them would destabilize the soil or leave voids as they decay.
Drafted with AI; not yet reviewed by a person.