
 By Admin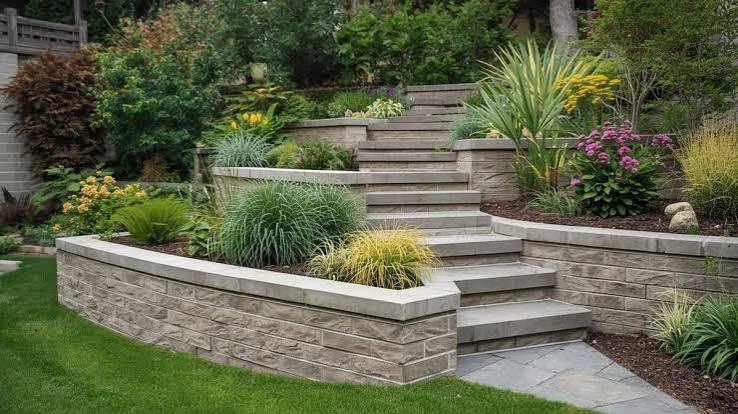
Last updated: September 10, 2026
Key Takeaways
- A wall that starts at 2 ft and ends at 4 ft is a 4 ft wall at its tallest point.
- A 4 in / 100 mm perforated drain pipe at the base is common in many systems, but only if it has a place to discharge.
- I’m also assuming you want to understand the planning, not just the block pattern.
- The safe DIY zone is narrower than many people think.
A retaining wall basics planning — complete guide keeps soil where it belongs when the ground has to change height. The real question is not “what wall should I buy?” It is “is this the right size, the right type, and safe for my site?” I’ll answer that directly. Planning a small garden wall? A terrace edge? A short slope fix? Then the retaining wall basics planning — complete guide below should help you judge the job, sketch the layout, and spot the trouble that turns an easy build into a headache. For general design background, see NCMA’s retaining wall guidance and guidance from the USDA Natural Resources Conservation Service on drainage and soil stability.
Table of Contents
- Who this guide is for — and who should do something else
- How do retaining walls actually work?
- What should I check before I design the wall?
- How do I plan a retaining wall step by step?
- What kind of retaining wall should I choose?
- The mistakes people actually make, and what they cost
- When should I stop and get qualified help?
- What does a good retaining wall detail look like?
- How do I adapt the plan for curves, corners, and tiered walls?
Who this guide is for — and who should do something else
This retaining wall basics planning — complete guide is for a homeowner, landscaper, or site owner planning a retaining wall under about 4 feet / 1.2 m tall, where the ground is stable enough to work with and the wall is mainly holding back soil rather than supporting a driveway, building, pool, or road. I’m assuming you can measure grade with a tape, level, or laser level, and that you can read a basic site plan. I’m also assuming you want to understand the planning, not just the block pattern.
The safe DIY zone is narrower than many people think. A wall can look small and still be risky if it sits above a slope, near a property line, under a fence, or in clay soil that stays wet. Once a wall starts carrying extra load from a driveway, a shed, a patio, a parked vehicle, or another structure, it stops being a simple landscaping feature. In those cases, the wall design may need structural calculations, drainage design, and sometimes permit review. That is where a licensed engineer or qualified contractor belongs, not because the work is glamorous, but because the consequences of a bad assumption are expensive. NCMA and local building departments commonly flag these conditions as review points, and you should consult a professional if the wall is near those limits.
A generic article usually pretends the main choice is timber vs. concrete block. Backwards. The real choice is whether the wall has to resist water pressure, surcharge load (the extra load behind the wall), and poor soil. A 2 ft / 600 mm wall in dry, granular backfill is a very different project from a 2 ft wall catching roof runoff from a downspout 6 ft away. The latter can fail from water alone. Ugly math. Fast.
My position is straightforward: if your site has any of these traits, I would stop treating it as a basic DIY wall and get qualified help before you dig, because that is the safer way to handle retaining wall basics planning — complete guide decisions on a site with slope, surcharge, or drainage issues.
How do retaining walls actually work?
Retaining walls work by resisting three things at once: sideways earth pressure, water pressure, and movement in the base. It is not just “holding dirt.” It is dealing with a wedge of soil that wants to slide, swell, or settle. That is why the footing, the drainage layer, and the backfill matter as much as the front face in retaining wall basics planning — complete guide work.
The first technical term to know is surcharge: any extra load near the top of the wall, such as a patio, fence, vehicle, shed, or even a heavily trafficked walkway. Surcharge increases the pressure on the wall. Another term is drainage mat or drain stone, the gravel zone behind the wall that lets water move instead of building pressure. A third is weep hole, an opening that lets trapped water escape. Not every wall uses weep holes, but every wall needs a plan for drainage.
Geometry matters here. A wall resists soil through mass, embedment, and sometimes reinforcement. In plain terms, the base has to be wide enough, the first course has to be set level, and the buried portion has to keep the wall from sliding or getting undermined. For segmental retaining wall blocks, manufacturers often specify a base trench, a leveling pad, geogrid layers, and a maximum wall height without engineering. I would follow the published system details for the block you choose rather than improvising dimensions, because these systems are built as assemblies, not loose parts. NCMA technical literature and manufacturer specifications are the right starting point here.
Think about failure this way: trapped water pushes harder; an uneven base makes the wall lean; poorly compacted soil behind the wall makes it bulge. Those are the three classic failure modes. One more thing — the wall, the drain, and the backfill are one system. You cannot fix bad drainage with a prettier face.
What should I check before I design the wall?
Before you pick a wall type or draw the first line, check slope, soil, water, loads, and boundaries. Sounds basic, yes. Still, that is where a lot of bad walls begin. A neat sketch on graph paper is worthless if runoff or property constraints get ignored.
Start with the slope and the height change. Measure the vertical rise from the low side to the high side, not the visible face height from one point. A wall that starts at 2 ft and ends at 4 ft is a 4 ft wall at its tallest point. Then look at what sits above the wall. A lawn is one thing. A parking area or shed is another. If the top of the wall is within a few feet of a driveway or structure, the surcharge load is real and the design has to reflect that.
Soil comes next. Granular soils like sand and gravel drain better and are easier on walls. Clay holds water and expands when wet, which adds pressure and can move the wall. Mixed fill is often the least predictable because it may contain broken concrete, topsoil, organic debris, or voids. If you uncover layers of fill, roots, or dark topsoil while digging, I would treat the site as less predictable than it first appeared and consult a qualified professional before proceeding.
What happens to the water? Watch the site after a rain, or at least trace roof downspouts, surface swales, and low spots. A wall that intercepts runoff from a roof edge or driveway needs more drainage planning than a wall in a dry corner. A 4 in / 100 mm perforated drain pipe at the base is common in many systems, but only if it has a place to discharge. A drain pipe that ends in a closed pocket is not drainage; it is storage. NRCS drainage guidance and local stormwater rules are useful references when you are deciding where that water should go.
Finally, check setbacks and boundaries. Property line issues, easements, utility runs, and fence posts can all shape where the wall can go. If you are not sure where the boundary falls, that is not a guessing exercise. Measure what you can, then verify before you excavate. Moving a layout line is cheap. Moving a finished wall is not.
How do I plan a retaining wall step by step?
Set the finished height first, then build the drainage and base details around that height. Not the other way around. The steps below are the order I would use on a real project.
- Mark the finished wall line and the high and low points. Drive stakes at each end, snap a string line, and mark the tallest point of the wall with a tape and level. Verify the line follows the intended edge and not a guessed contour. A problem shows up if the string line crosses into a driveway, fence line, or utility area, because the wall location is wrong before digging begins.
- Measure the true height change. Use a laser level, builder’s level, or a long level with a straight board to measure from the proposed top line down to the existing grade every 4 to 6 ft / 1.2 to 1.8 m. Verify the tallest section, because wall design follows the maximum height. A problem shows up if the height varies more than expected or jumps at one end, which usually means the slope is more complex than it looked.
- Check the setback and batter required by the wall system. Batter is the slight backward lean of the wall face, often built into segmental block systems. Follow the manufacturer’s specified setback, commonly measured in inches per course rather than by eye. Verify the wall will lean back enough to resist soil pressure. A problem shows up if the block face wants to stand plumb when the system calls for tilt, because the wall may be assembled outside its design.
- Plan the base trench. Mark a trench wide enough for the block plus working room, then allow enough depth for the base material and the buried starter course. Many segmental walls use 6 in to 8 in / 150 mm to 200 mm of compacted base under the first course, but follow the block system’s instructions or the manufacturer’s published section detail. Verify the trench stays on undisturbed subsoil where possible. A problem shows up if the trench bottoms in loose fill, mud, or organic material, because the wall may settle unevenly.
- Design the drainage zone. Plan for at least 12 in / 300 mm of clean, angular drainage stone behind the wall face, plus a perforated drain pipe at the base where the system requires it, or use the manufacturer’s specified drainage detail. Verify the pipe can daylight to a lower outlet or a proper drain connection. A problem shows up if the plan has nowhere for the water to leave, because trapped water creates pressure. For drainage layout examples, the USDA NRCS and many block manufacturers publish section details you can compare against.
- Choose backfill intentionally. Use free-draining material immediately behind the wall and keep heavy clay, topsoil, and organic matter farther back. Verify the backfill can compact in layers without becoming a wet slurry. A problem shows up if the excavated soil is sticky, holds shape when squeezed, or smears on the shovel, because it may be poor drainage material near the wall.
- Decide whether reinforcement is needed. For taller walls or walls with surcharge, add geogrid where the system calls for it. Geogrid is a plastic reinforcement mesh buried in horizontal layers in the backfill. Verify the grid length and spacing match the wall system and expected load. A problem shows up if the wall height is pushing past the unreinforced limit or the top carries a load, because the wall may need engineered reinforcement.
- Set maintenance access and surface runoff control. Leave room to inspect the top, direct runoff away from the wall crown, and avoid dumping water onto the backfill. Verify that downspouts, swales, and hardscape slopes will not feed water into the wall. A problem shows up if the finished grade slopes toward the wall, because you are building a drain problem into the design.
A good plan ends with a simple section drawing: existing grade, finished grade, wall face, buried base, drain stone, pipe, and any geogrid layers. If you cannot sketch those pieces clearly, the wall is not fully planned yet. That drawing often reveals whether the project is a weekend build or a wall that belongs in an engineered package.
What kind of retaining wall should I choose?
Choose the wall type by height, drainage need, appearance, and whether the wall must carry load — not by the cheapest square foot. That is where people get trapped. A wall that looks inexpensive on paper can become expensive once you add excavation, drain pipe, geogrid, and disposal of soil.
For short garden walls, segmental retaining wall blocks are often the most forgiving option because they are modular and designed as a system. They also come with rules: base depth, setback, drainage stone, and sometimes reinforcement limits. Timber walls can work for low walls, but they are more vulnerable to rot, fastener corrosion, and movement over time, especially in wet climates. Cast-in-place concrete is strong and can handle more demanding conditions, but it is less forgiving of mistakes and usually belongs with a more formal design. Stone can be beautiful and durable, yet it takes skill to stack properly and to manage the base and drainage.
The wrong choice is usually a wall selected only for appearance. I would be cautious with timber wherever soil stays wet for long periods, because the buried portion is where decay starts. I would be cautious with dry-stacked stone if the site sees freeze-thaw movement or irregular loading, because gravity walls depend on mass and accurate placement. I would be cautious with tall segmental walls that are built without geogrid because the wall may look complete while the hidden reinforcement is missing.
Cost matters, but I’m not going to invent a universal price per square foot because local material and labor rates move too much. What matters is the cost structure: excavation, base stone, drain pipe, wall units, cap units, geogrid if needed, and disposal of spoil. A wall that needs a truckload of extra base and a proper outlet for drainage can cost more than the face material suggests. That is the trade-off readers often miss.
My rule of thumb is simple: choose the least complex wall type that fits the height, drainage, and load. If you need a wall to last in a wet or loaded setting, simplicity in appearance is not the same thing as simplicity in structure.
The mistakes people actually make, and what they cost
The most common mistakes are boring, repeatable, and expensive. I list them because they are the failures a generic article usually glides past.
-
Skipping drainage stone or drain pipe. The consequence is hydrostatic pressure, which is water pressure behind the wall. That pressure can bow blocks, push timber outward, or crack concrete. The correct alternative is a continuous drainage zone and an outlet path for water, even if the wall is short.
-
Building on a trench that is too shallow or too narrow. The consequence is settlement or toe slip, where the wall slides or sinks at the bottom edge. The correct alternative is a base trench sized to the wall system, cut into firm subgrade, then compacted in lifts. If the soil at the base is soft, stop and rework it.
-
Using excavated clay as backfill right behind the wall. The consequence is trapped water and swelling soil pressure. The correct alternative is clean, free-draining aggregate near the wall face, with clay moved farther away or replaced where necessary.
-
Ignoring slope above the wall. The consequence is that runoff pours into the backfill and overloads the drain zone. The correct alternative is to intercept water upslope with swales, downspout extensions, or grading that sheds water away from the crown.
-
Laying the first course out of level. The consequence is that every later course inherits the error, so the wall drifts, gaps open, and the cap line looks crooked. The correct alternative is to spend time on the base course, check it in both directions, and correct the trench before stacking more than one course.
-
Treating a tall wall like a garden edging project. The consequence is hidden structural failure, often with a wall that looks fine for a while and then leans after a wet season. The correct alternative is to respect system limits, add reinforcement where needed, or move to engineered design with professional input.
Those mistakes are not random. They come from one habit: staring at the visible face and forgetting the soil behind it. A wall is judged by what you cannot see.
When should I stop and get qualified help?
Stop when the wall is tall, loaded, wet, or tied to a structure, because those are the conditions where a simple retaining wall turns into a structural problem. This is the section that keeps a bad project from becoming a collapsed one.
Wall height is about 4 ft / 1.2 m or more at any point: the pressure rises quickly with height, and many standard systems have limits — get an engineer or a wall system design that matches the full height.
The wall supports a driveway, parking area, shed, fence with heavy posts, or patio within a few feet of the top: that is surcharge load — use qualified design, because the load can overwhelm an ordinary wall.
Water flows toward the wall from a slope, roof, or paved surface: drainage control becomes the main design issue — add proper surface drainage or have the wall laid out with a drain outlet and backfill plan before you build.
The site has soft fill, buried debris, organic soil, or major tree roots: the base can move or void later — excavate to competent material and reassess the design, because the wall may need a different footing or reinforcement.
The wall is near a property line, utility line, septic component, or easement: the legal and physical limits may be tighter than the build area — verify the boundary and utility layout before any excavation.
The plan includes steps, curves, corners, tiered walls, or tight changes in height: those details change the load path and drainage — use a more detailed layout or a professional design